


It's time for a 


 tutorial
 There are
  parts in this tutorial
tutorial There are parts in this tutorial  Makeup Accessories Hair BONUS SURPRISE!
Let's Begin!
Part 1 Makeup
 Primer
  Liquid Foundation Concealer Powder
 |
| Step 1, 2 and 3. |
STEP 1

Eyebrows
 Just showing you the before photo.
 Fill in your brows with you're preferred colour.
 Soften your brows with a spooly, especially the head of the brows.

 Follow your theme colour but if the theme is colourful, go wild!
 |
| 1 and 2 |
STEP 2
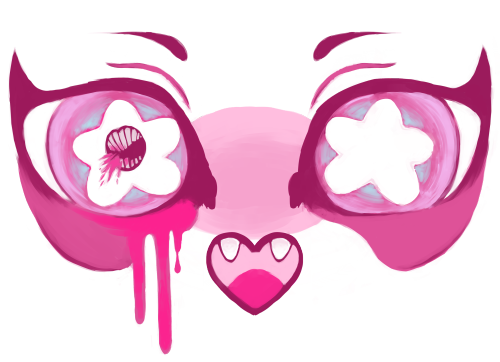
Eyeshadow
 Eye opened. Eye closed.
Refer to the map here
The colours used are
Pink Light Blue Blue Purple Gold Sparkles Apply pink eyeshadow all the way up to your crease line. Apply blue eyeshadow above the crease line. Blend the pink and blue with purple.
 Apply gold sparkles at the inner corners all the way up to your brow bone and at the
center of your lids.
 Blend the blue and gold sparkles at the brow bone with light blue eyeshadow. If you don't like the colours used here, feel free to use any colour of your choice!
 |
| Step 1, 2 and 3. |
STEP 3 Eyeliner
Eyeliner Tight line your eyes with a black pencil eyeliner. Draw a thick line above your lash line with a liquid eyeliner.Photo of the closed eye. Black is bold and stands out the best for this look!  |
| Top - Step 1 and 2 Bottom - Step 3 and 4 |
Place an eyelid tape to create a higher crease.
Closed eye view. you can see that thesticker is very obvious.
Apply pink eyeshadow on the sticker tohide it and add eyelid or eyelash glue
to the ends of the sticker.
This is how it will look like when theglue is dried.
Use semi'circle oval shaped eyelid stickers to get a kawaii round eye effect! Use glue that is white and turns transparent when it's dried!
BEFORE & AFTER!

STEP 5 Wing
Wing Extend your eyeliner outward and downward. By doing so, you are enlarging your eyes
and making it appear rounder.
 |
| Open and closed eye after extending the eyeliner. |
 |
| Step 1 |
Eyelashes Prep your falsies. Add the demi lashes to the ends of thesecond pair.
Apply glue to your D.I.Y. falsies and stick the falsies to thetop of your eyeliner line; Away from the lash line.
Apply glue to the lower fake lashes and place them underthe lower lash line as shown in the middle picture below.
Connect the inner corners to the falsies with the sameblack liquid eyeliner as earlier.
Draw a small line downward at inner corners of the eyes to make them rounder.  |
| Step 2, 3 and 4. Top - Opened eye Bottom - Closed eye |
STEP 7 Face
Face
Photo Highlight
Recommended a shimmery gold champagne colour, get a highlighter with a pearl
shine instead of one that has huge flakes of glitter.
HighlightRecommended a shimmery gold champagne colour, get a highlighter with a pearl
shine instead of one that has huge flakes of glitter.
Photo Contour
Use a matte brown colour for contouring. When you're contouring, you're basically
enhancing the shadows on your face and shadows aren't shiny.
ContourUse a matte brown colour for contouring. When you're contouring, you're basically
enhancing the shadows on your face and shadows aren't shiny.
Photo Blush
Use a rose pink blush on the red dotted areas and a soft pink blush for the pink dotted
areas. Be sure to blend it well and focus on the apples of your cheeks!
REMEMBER TO BLEND!!!
BlushUse a rose pink blush on the red dotted areas and a soft pink blush for the pink dotted
areas. Be sure to blend it well and focus on the apples of your cheeks!
REMEMBER TO BLEND!!! 

STEP 8 Decorate
DecorateThis is the best
 my favourite part of the whole tutorial Have fun

LIPS
I put rhinestones on my lips. The key here is finding a lipstick colour that matches the rhinestones!

EYES
 NECK
NECKI found this rose in my collection so I added it on my neck. I've drawn on some veins with a turquoise coloured eyeliner and added tiny green pearls along them. This step is optional of course.
EXTRA
 Add rhinestones on your arms and legs. Used your eyeliner to draw on shapes and
patterns on your skin or face.
Decorate your nails too!
Final Look!
Part 2 Hair

Put on a wig of any choice. This step is optional.
Add hair clips all over your bangs.
Braid a few parts of your hair and secure them with cute hair clips.
Add some more hair accessories on the other side.
A colourful wig would be awesome!
Put on a wig of any choice. This step is optional. Add hair clips all over your bangs. Braid a few parts of your hair and secure them with cute hair clips. Add some more hair accessories on the other side. A colourful wig would be awesome!  It features Haruka Kurebayashi
Part 3 Accessories

Go wild have fun with this For what I did, I just threw on almost everything 
have fun with this For what I did, I just threw on almost everything You can choose your accessories by theme like Animals, or Pastel E.T.C
Part 4 The Surprise: Inspiration!
I do not own any of the photos below They're all from Tokyo Fashion's website  You can click on the photos below to check out their posts
  get more details on their coords
They're all from Tokyo Fashion's website You can click on the photos below to check out their posts get more details on their coords 


 So that's all for this post
 so much for coming by
  Stay tuned for other tutorials


